
 For the ear warmer/headband, 68 stitches are required. 272 for the scarf. Any number of stitches can be crocheted using this technique so reduce and increase as you wish. For binary crocheting, it is recommended that you use a size of hook at least one size up from that recommended for the yarn. Perhaps two sizes up for yarn thicker than 4-ply. The yarn used in this tutorial is DK weight and the hook is 6mm (J/10). Gauge is 14 sts and 16 rows makes a 4 in/10 cm square worked in pattern with two strands of DK yarn. |
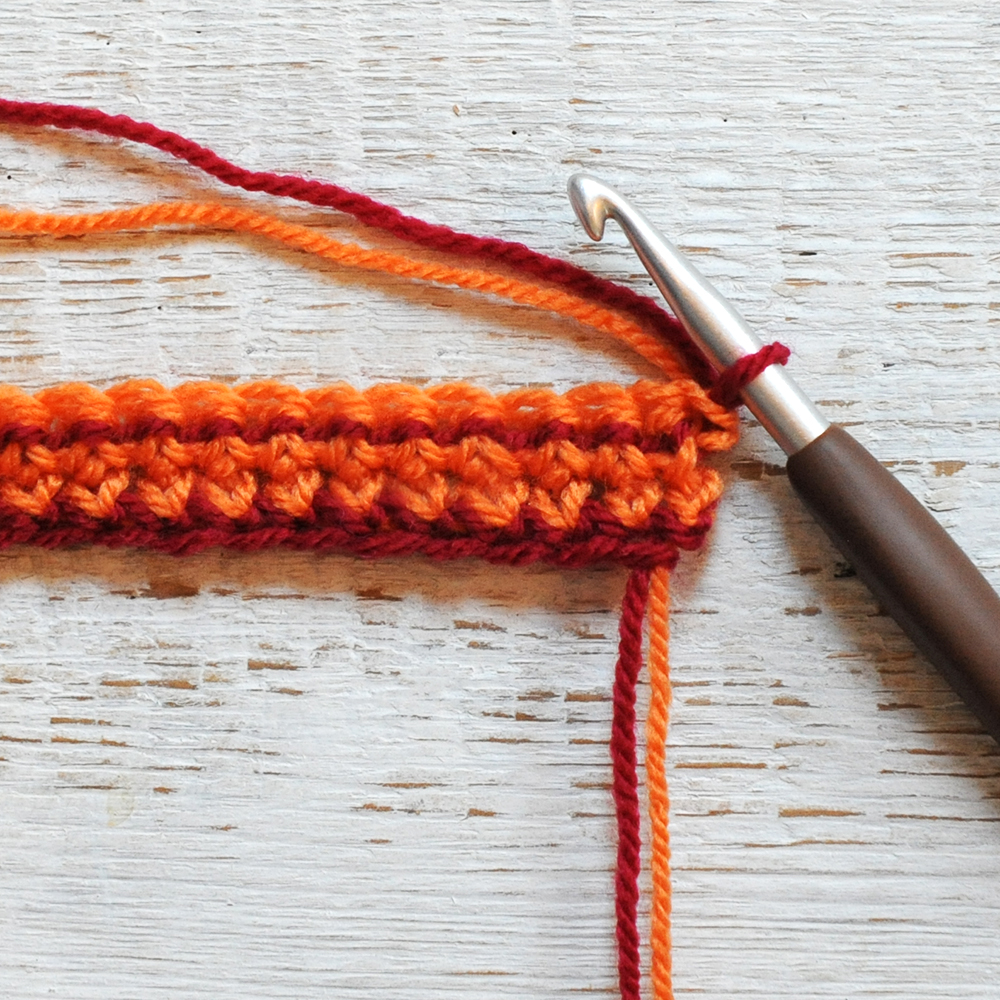
| Step 22 In this example, orange is referred to as the “dominant yarn” and red the “supporting yarn”. After making the binary foundation double crochet row for the necessary number of stitches called for in the pattern, we need a binary turning chain. With supporting yarn, yarn over from below hook going from front to back |
 |
| Step 23 With dominant yarn, yarn over from above hook going from back to front. |
 |
| Step 24 Pull dominant yarn through two loops (one loop remaining on hook). You have completing a binary turning chain. You need to make one at the start of every new row of binary double crochet. It does not count as a stitch. Turn. |
 |
| Step 25 Position the binary foundation double crochet row to your left and hook on the right. Keep the supporting colour parallel to the chain as if you were about to crochet over it. Insert hook into the two uppermost dominant coloured loops of the first stitch as indicated by the darning needle. Ensure hook goes under the strand of supporting colour yarn. |
 |
| Step 26 With dominant yarn, yarn over from above hook going from front to back. |
 |
| Step 27 Pull dominant yarn through stitch (two loops on hook). |
 |
| Step 28 Using the supporting colour, yarn over from below hook going from front to back (three loops on hook). |
 |
| Step 29 Using dominant colour, yarn over from above hook going from back to front and pull through all three loops (one loop remaining on hook). |
 |
| Step 30 You have almost completed one binary double crochet stitch. Before making the next stitch, give the supporting yarn (red) a gentle tug to take up the slack, not too much. Don’t worry about exactly how much for now. I will be giving you some tips on how to achieve the perfect tension for your supporting yarn a little further along. |
 |
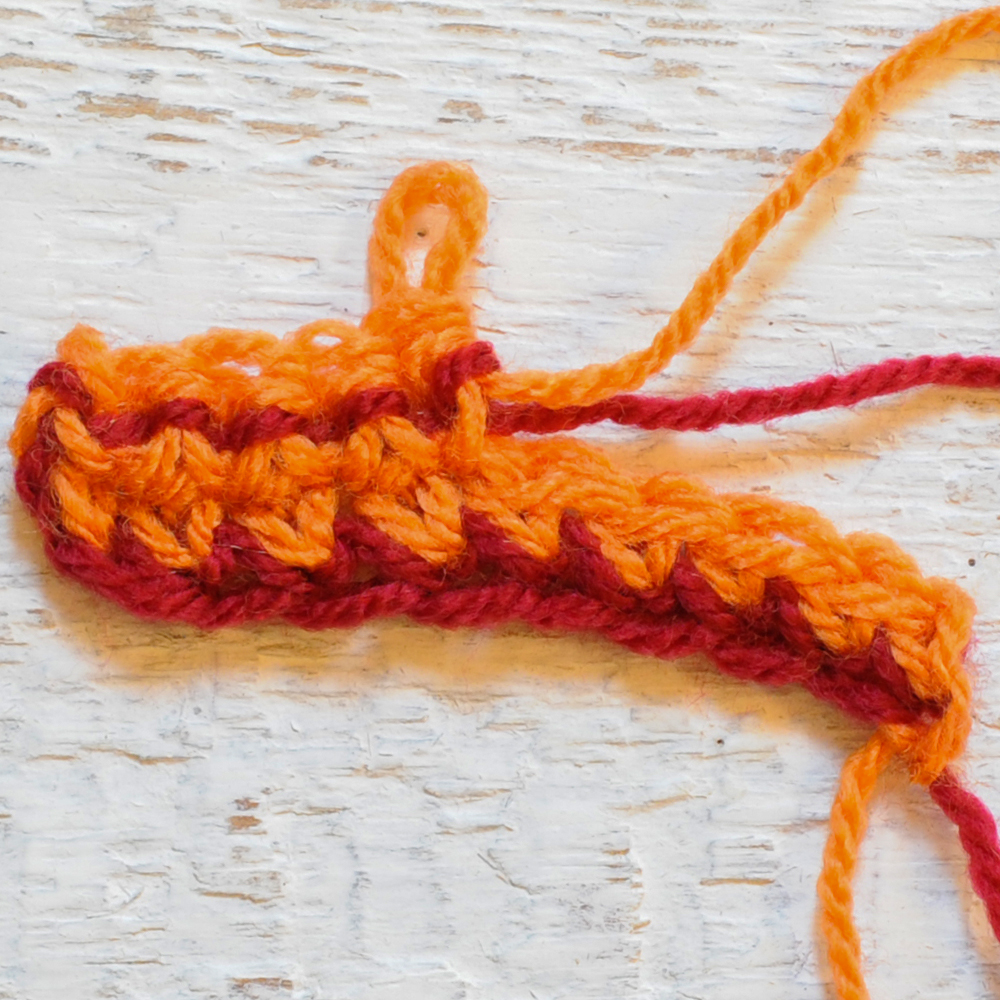
| Step 31 Insert hook through both loops of the next stitch (as indicated by the darning needle - it looks like there’s only one but the second is obscured behind the first loop). Ensure hook also goes under the strand of supporting colour yarn. To make further binary double crochets, repeat Steps 26 to 31. Do three or four more stitches and then I want to give you some tips to help neaten your binary crochet. |
 |
| Video for Steps 22-31 | |
| Too loose? Turn your work over to inspect the other side. Depending on how tightly you tugged on the supporting yarn at the end of step 9, it could look very different to how we really want it to. The photo to the right shows we didn’t tug hard enough (or at all) and the tension on the supporting yarn is too loose. |
 |
| Too tight? This photo shows the tension is too tight, the supporting coloured loops are pinching the dominant colour too much, you can’t see enough of the supporting colour. In extreme cases, the supporting yarn might disappear into the dominant yarn altogether. |
 |
| Just right This is how we ideally want it to look, the supporting yarn looks like a series of dashes, sitting snugly below the dominant coloured loop above it. Neither too tight nor too loose – this is the goldilocks zone, “just right” is what we’re aiming for. It takes a few practice rows to get to know how hard to do that little tug on the supporting yarn at the end of making the stitch. |
 |
| Practice makes perfect. Keep doing this row and frogging it (unravelling) until you’re happy with how it looks. When you’re proficient and wanting to be able to work faster at binary double crocheting, you may want to do all your tensioning of the supporting yarn before you do the next supporting yarn over (just before step 28 rather than as part of step 30). | |
Rows 4 and 5 So far on the ear warmer/headband, we have made two rows using orange as dominant and red as supporting. For the next two rows, we are going to swap the dominance, making red the dominant colour and orange the supporting colour. This is achieved very simply. At the end of the second row, move the orange yarn down so it is underneath the red yarn |
 |
| Work your binary turning chain (yo with orange first and then red), turn and then continue as you did with the second row. The only difference will be the yarn colours will be swapped over. Work two rows with red as dominant and orange supporting |
 |
Rows 5 and 6 – Swap back to orange dominant and red supporting for these two rows. Keep alternating dominance every two rows until 17 rows have been completed Cut tails, weave in three of the tails, leave one in the corner long enough to sew the open ends of the ear warmer/headband together (approx 18 in /45 cm). |
|
| Sewing up Fold the ear warmer/headband in half lengthwise with whichever side you prefer inside the fold. Shape it into a capital U with the fold on the outside as shown on the photograph. |
 |
| Grasp an end with each of your hands, holding between your thumb and two forefingers, interleaf one end into the other end as indicated in the photograph. |  |
| Sew through all four layers of the ends, catch two loops on each layer. Work your way along with the stitches going up and down all along. Weave in the final end and then carefully cut yarn off close to your work. |
 |
| Turn the ear warmer/headband inside out so the stitches are inside and try it on! |  |
SCARF INSTRUCTIONSThe scarf photographed measures 62 in x 8.5 in (157.5 cm x 22 cm) excluding fringe and requires 272 stitches on your Binary Foundation Double Crochet row. To alter the length of the scarf, you can add or subtract as many sts as you like.To make the scarf in two colours, follow this tutorial's instructions for the ear warmer/headband, ie 2 rows with orange (say) dominant and red (say) supporting, the following two rows with red dominant and orange supporting. Continue alternating every two rows. To make a version of the ear warmer/headband or scarf in the rainbow shades of the one photographed, you will need nine different colours. The paid for print-ready PDF pattern in my Etsy shop CLICK HERE contains a full list of the colours used and quantities, which rows are dominant and supporting. It also has a tutorial on how to change the supporting yarn colour. The paid for version includes a separate PDF document written entirely in US terms. | |
EXAMPLES | |
| Red dominant colour, orange supporting on every row Both sides are the same | |
 |
 |
| Red and orange take turns at being dominant, changing on every row Back and front subtly different but both look attractive | |
 |
 |
| Red dominant for two rows, next two rows orange dominant, repeated More pronounced difference between the two sides, both very interesting | |
 |
 |
| Have fun coming up with your own variations! | |
0 Comments:
Post a Comment
Thanks so much for visiting, I love it when people leave me messages!