
 It's tricky to define it but here goes .... (UK crochet terminology is used throughout) Binary crocheting is a way of crocheting using two colours in every row. The two colours aren’t used doubled throughout your work but neither are they carried behind. You don’t need bobbins of yarn either. One colour is kind of partially crocheted over, combined with yarn overs. Different effects can be achieved by varying which colour is dominant and the number of rows where one colour is dominant over the other. It sounds complicated but it really isn't, it's easy - and fun - to learn You'll understand more when you actually do it! This tutorial shows you how to make a binary foundation double crochet row, step by step with detailed photographs. The binary double crochet foundation row is how both of the above two designs (ear warmers and a scarf) are started. This technique creates the chain start *and* the first row of double crochet at the same time. There will be another tutorial soon showing how to continue to do your follow on rows. The yarn used in this tutorial is DK weight and the hook is 6mm (J/10). Ordinarily I would use a 4mm (G/6) hook for DK weight yarn. For binary crocheting, it is recommended that you use a size of hook at least one size up from that recommended for the yarn, perhaps two for yarns thicker than 4-ply. You will need:
|
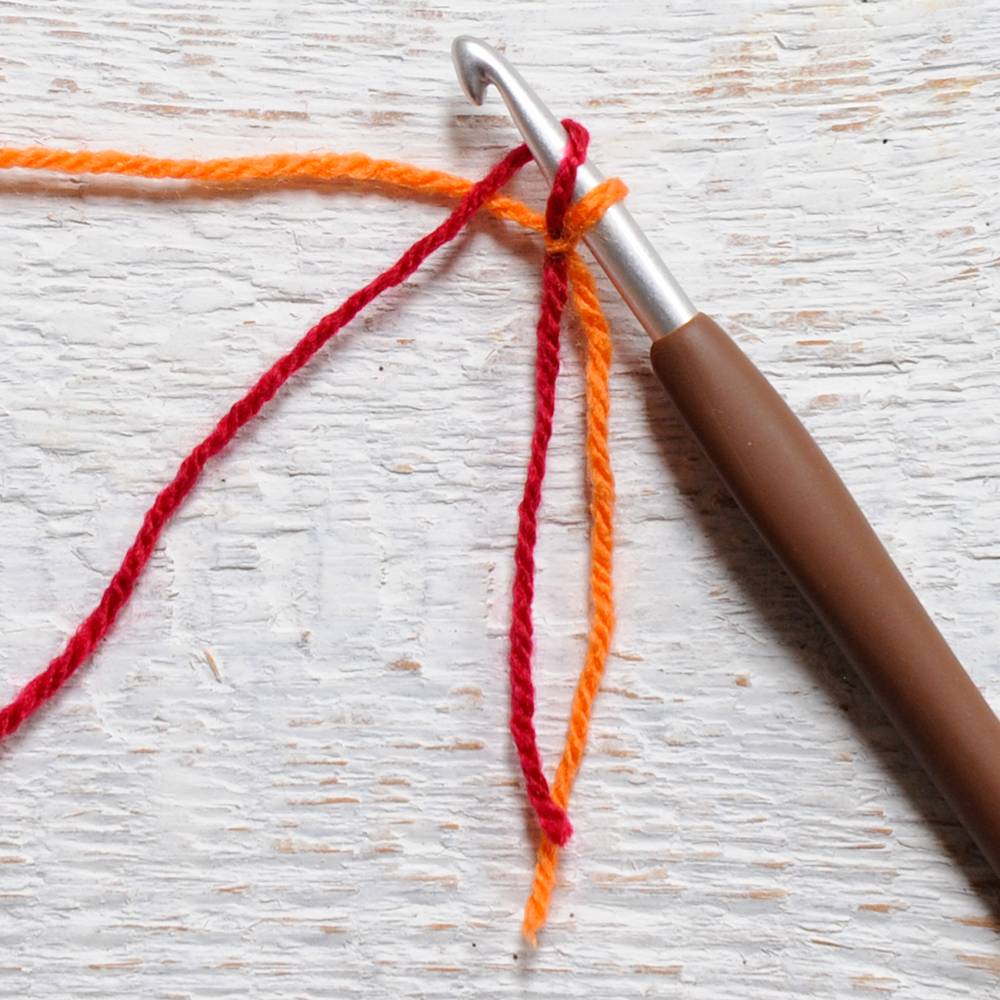
| Step 1: With two colours of yarn held together, make a slip knot. Don’t make the slip knot too tight, we will be unpicking it at the end of the row. |
 |
| Step 2: In this example, orange is referred to as the “dominant colour” and red as the “supporting colour”. Leave the tails of the yarn dangling down, pull the supporting colour (from the red ball of yarn) so the loop shrinks and eventually disappears, leaving only the dominant colour loop remaining |
 |
| Step 3: Place remaining loop on hook and tighten the dominant colour so it sits on the hook neatly – remember not so tightly that it will be difficult to undo later. Be careful about tugging on the supporting colour, if you pull on it too much, it will come off! Re-arrange your working yarn (from the balls of yarn) so the dominant colour is on top of the supporting colour and two yarn tails left hanging below. |
 |
| Step 4: With supporting yarn, yarn over from below hook going from front to back. The supporting yarn should end up in front of the dominant yarn. |
 |
| Step 5: With dominant colour, yarn over from above hook going from back to front. |
 |
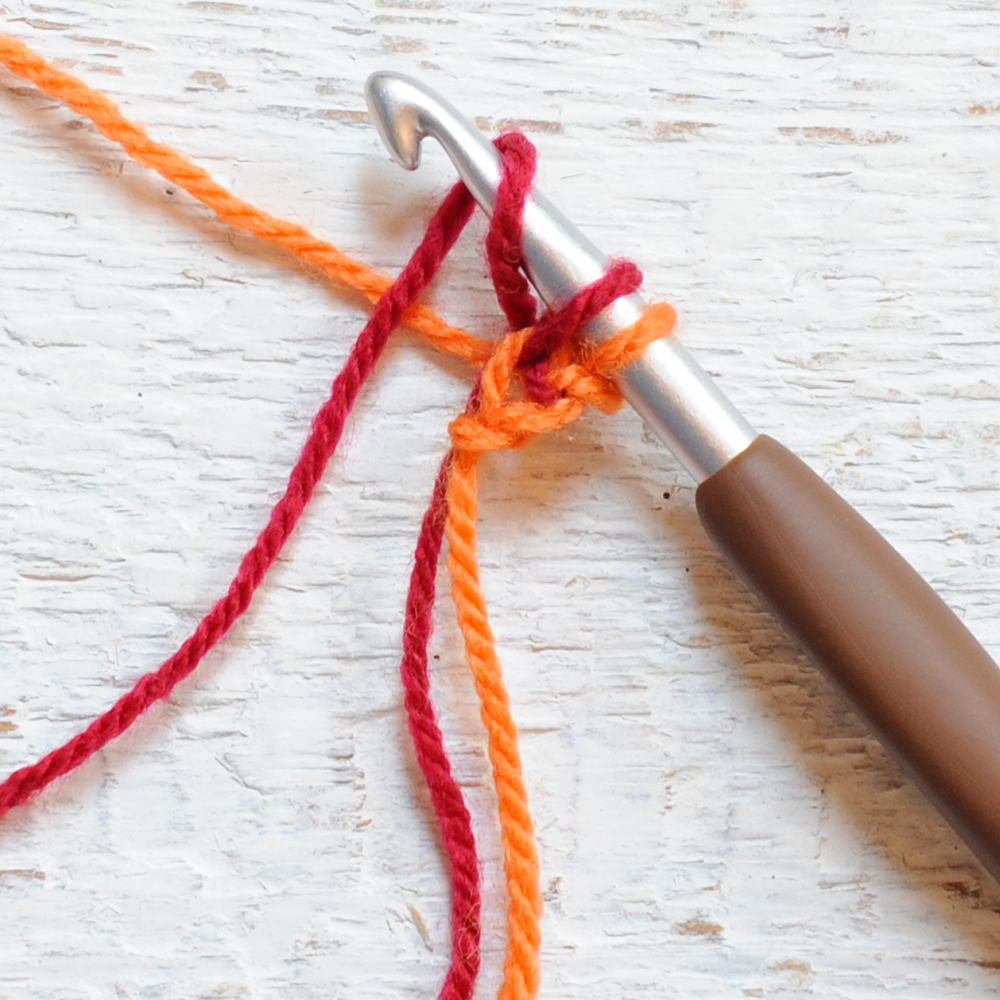
| Step 6: Pull the dominant coloured loop through two loops. One binary chain completed. (One loop on hook). |
 |
| Step 7: Repeat steps 4-6 once. Two binary chains completed. (One loop on hook) |
 |
| Step 8: Insert hook into two loops of the first binary chain (one of each colour). (Three loops on hook) |
 |
| Step 9: With supporting yarn, yarn over from above hook going from back to front. |
 |
| Step 10: Pull supporting colour through first two loops only. (Two loops remaining on hook) |
 |
| Step 11: With supporting colour, yarn over from below hook going from front to back. |
 |
| Step 12: With dominant colour, yarn over from above hook going from back to front. |
 |
| Step 13: Pull dominant colour through first two loops only (two loops remaining on hook) |
 |
| Step 14: With supporting colour, yarn over from below hook going from front to back. |
 |
| Step 15: With dominant colour, yarn over from above hook going from back to front. |
 |
| Step 16: Pull dominant colour through all three loops (one loop remaining on hook) |
 |
| Step 17: Insert hook into two loops (both supporting colour) of the stitch below the current stitch |
 |
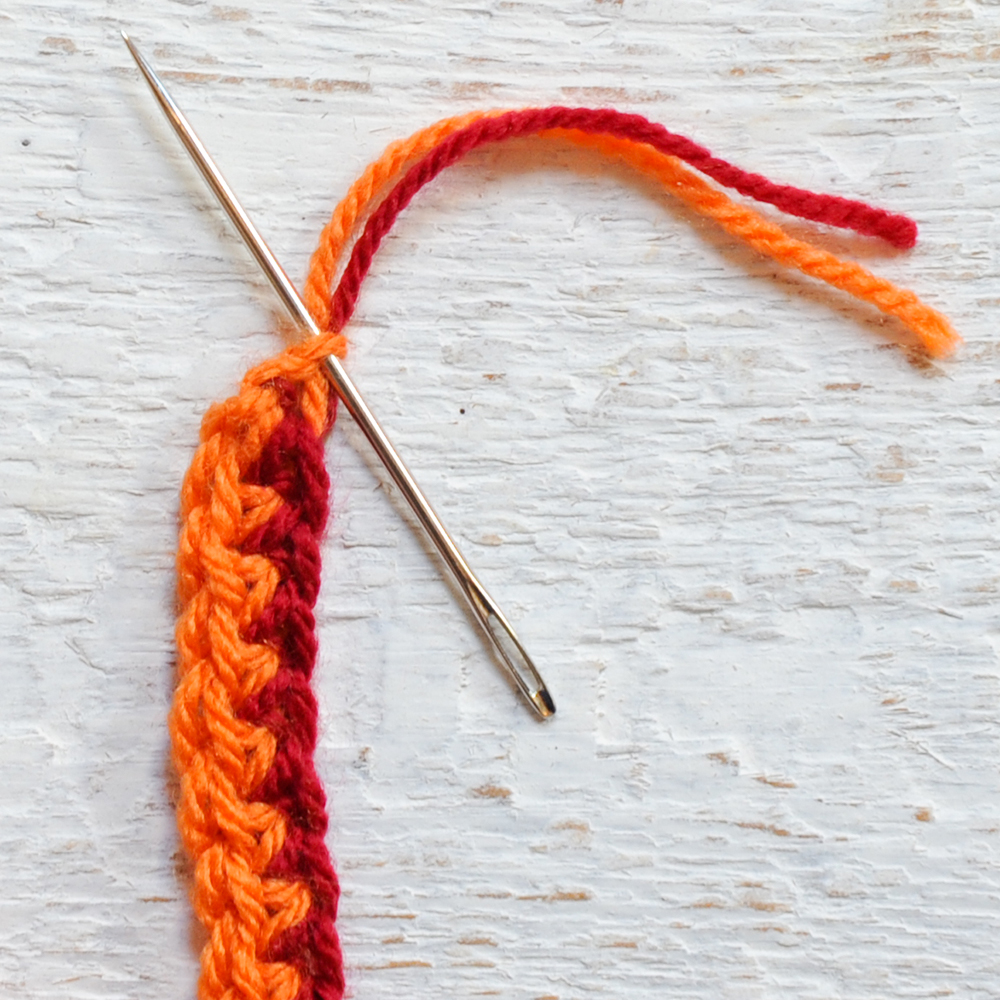
| Step 18: Repeat steps 9 to 17 for as many times necessary to produce the number of stitches desired, ending on Step 16. The photographs will not match on the next run through but follow the written instructions exactly and you will end up with a binary double crochet foundation row like the one in the photograph. |
 |
| Step 19: To neaten the beginning of the binary foundation double crochet row, we’re going to unpick the slip knot made at the beginning of the row. Insert a blunt darning needle into the small dominant coloured loop at the tip of the beginning of your work (as indicated in the photograph) |
 |
| Step 20: Carefully pull on the loop to enlarge it, keep pulling until the end of the yarn runs through the loop. |
 |
| Step 21: Give both yarn ends a gentle tug to resettle and neaten up. |
 |
VIDEOSSteps 1-17Step 18 Steps 19-21 |
| Please see the following tutorial "Binary Double Crocheting" CLICK HERE for instructions on making the follow on rows. Once you've learnt how to do the rows, you will be able to make both the ear warmer/headband and scarf too. Print-friendly and US terms versions of the the patterns are available as downloadable PDFs in my Etsy shop, CLICK HERE to visit. |
It would be great if you or one of your testers could do a video tutorial
ReplyDeleteHi there, I've now edited the postings to include embedded videos from my YouTube channel showing how to do the various steps. I hope this helps!
Delete